Q: Following the Bank of England Base Rate change yesterday, we are hoping to adjust the interest rates and subsequently the payments due for each of our loans on the LMS system.
All our loans are set at interest of a set margin + BoE Base rate, as BoE base rate changed from 4.5% to 4.25%, I need to change all loan interests -0.25% and then adjust the expected repayments to reflect the interest rate change
A: There are two ways to do this. The Old way and the New way as of version 5.6 (but do update to 5.7 at www.margill.com/get). We recommend the New way…
The Old way (Booo…)
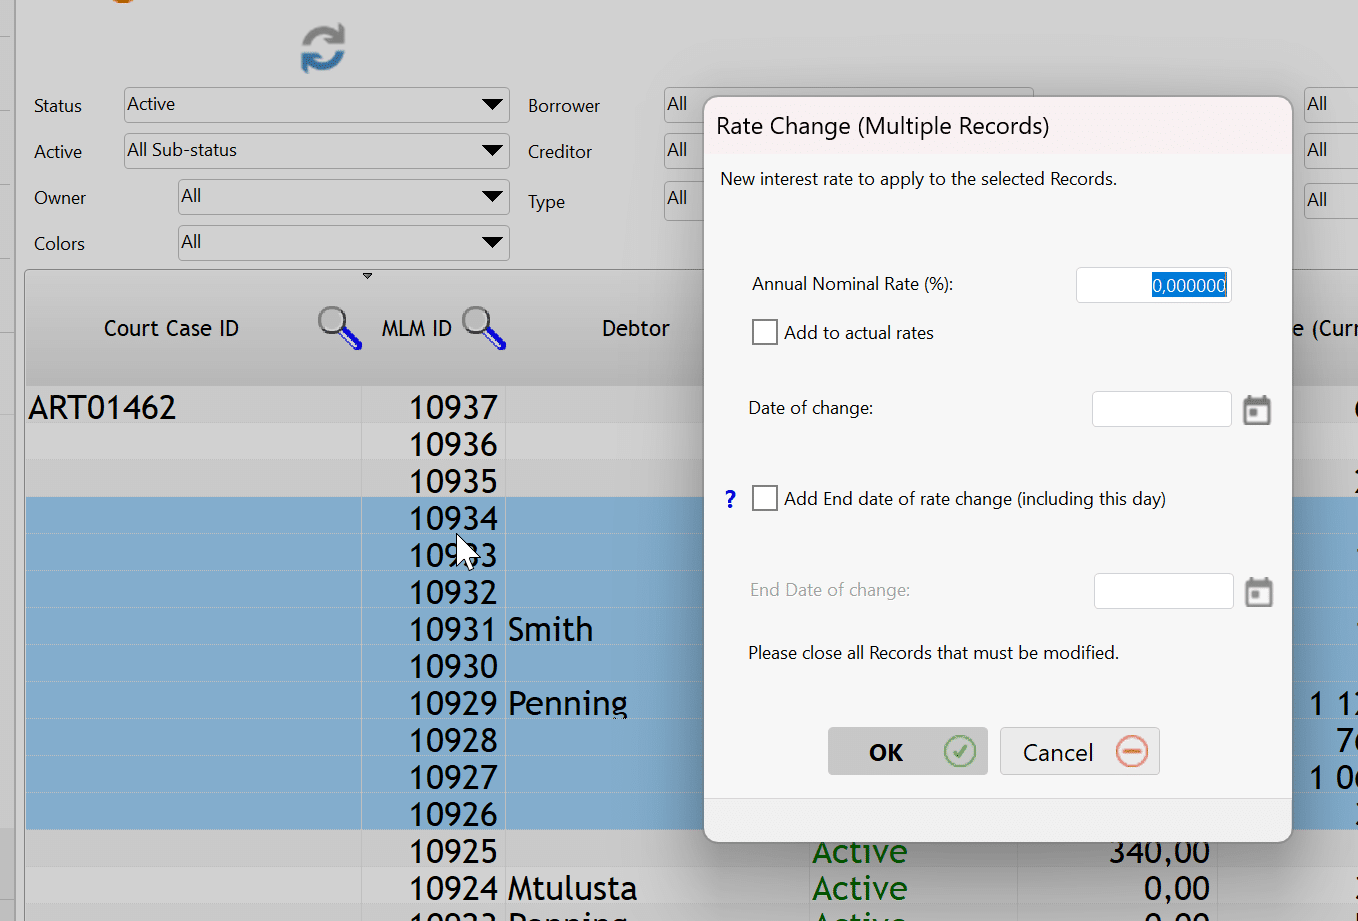
You can change the rates easily by selecting the loans you wish to change and the Ctrl Alt Shift i. This window will appear allowing you to reduce the rate of all the loans by .25. So you will enter -.25 and click on Add to actual rate (so you will add -.25%)
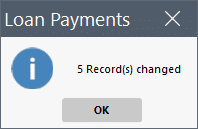
As for changing the payments to reflect this change, with the above method you would have to go in each loan and recompute the payments for Balance = x (right mouse click > Payments….).
The New way (Yeah…)
I’m not sure if you are on the latest version (5.7 when writing this) but new options are available for variables rates.
You can now link loans to Rate tables and when you change the Rate table, then all Payment schedules get updated to the new rate and you can tell Margill to recompute the Due payments to reach a final balance of 0, X or the existing balance, before the rate change. So very powerful options that you can add to existing loans. A bit of work once but then you are all set. Global changes allows you to mass change the Records to the new variable rate method (see lower down).
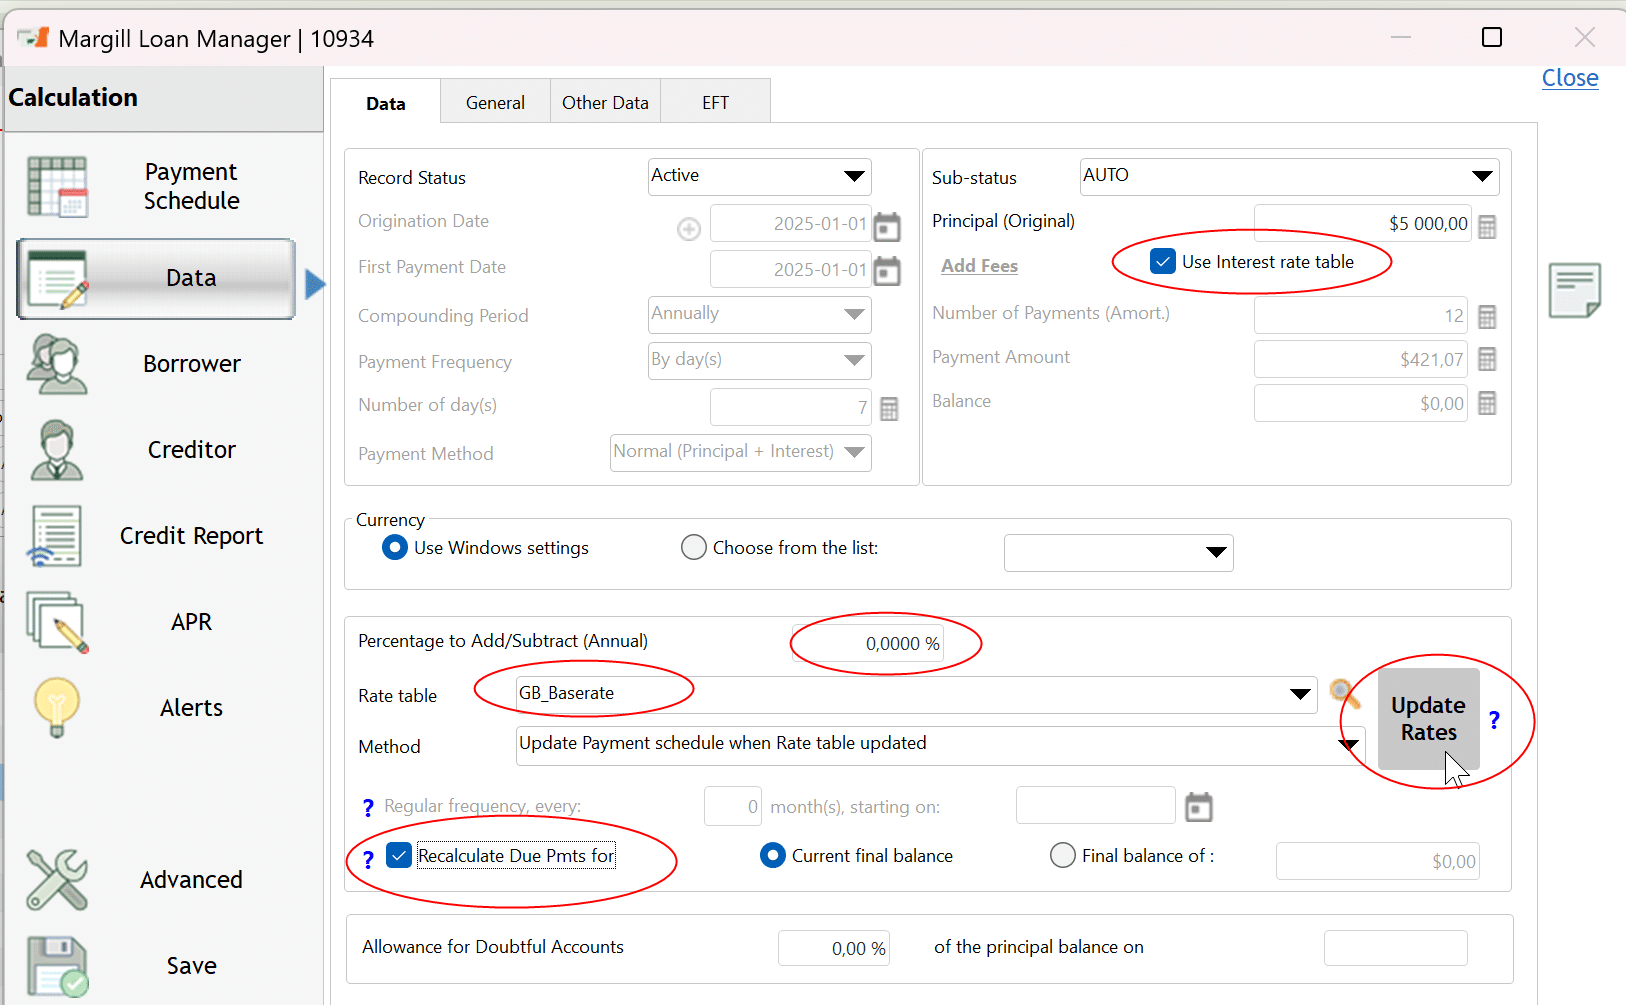
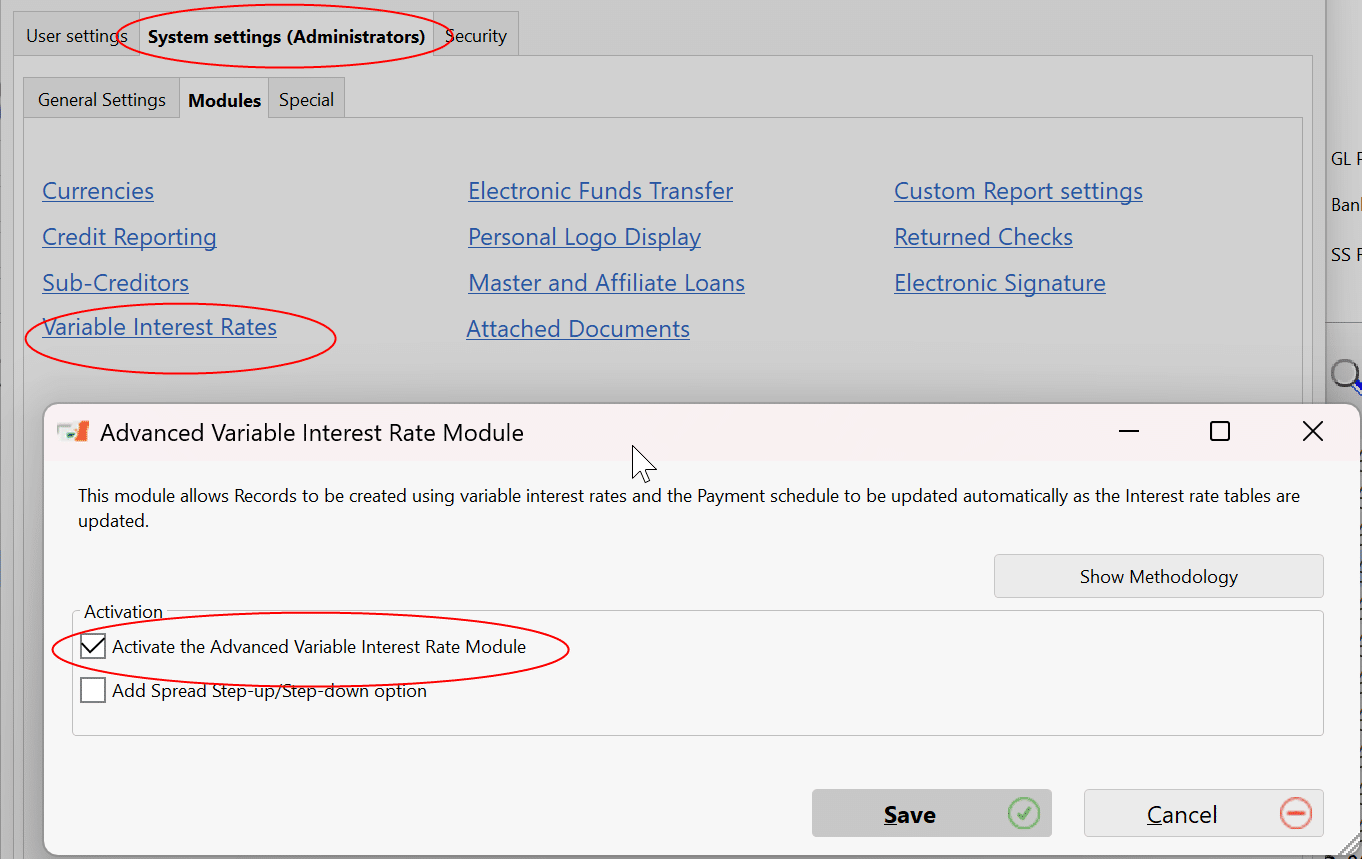
You might need to Activate the Advanced Variable Interest Rate module in Settings (your Settings will not look like this yet – Modules is not a separate tab in Margill 5.7 – I am on Beta 5.8).
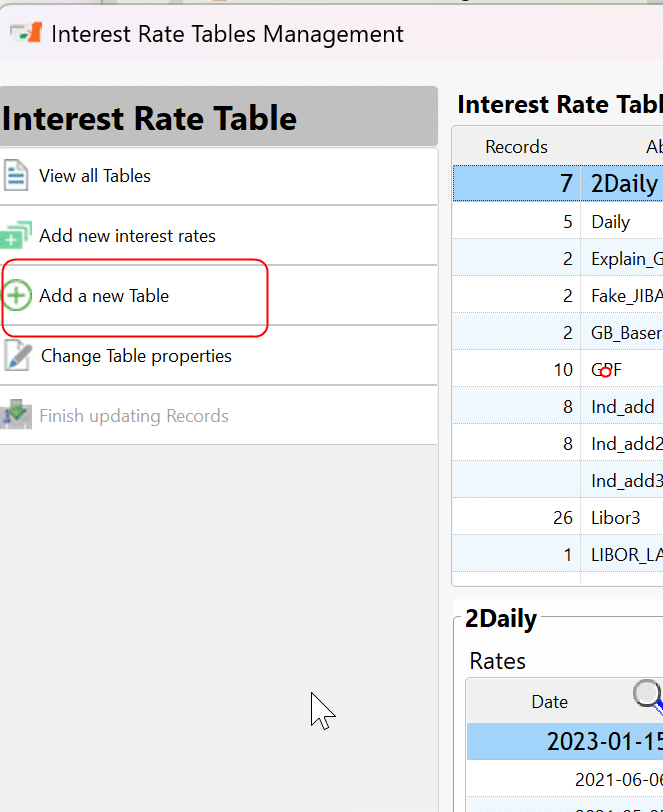
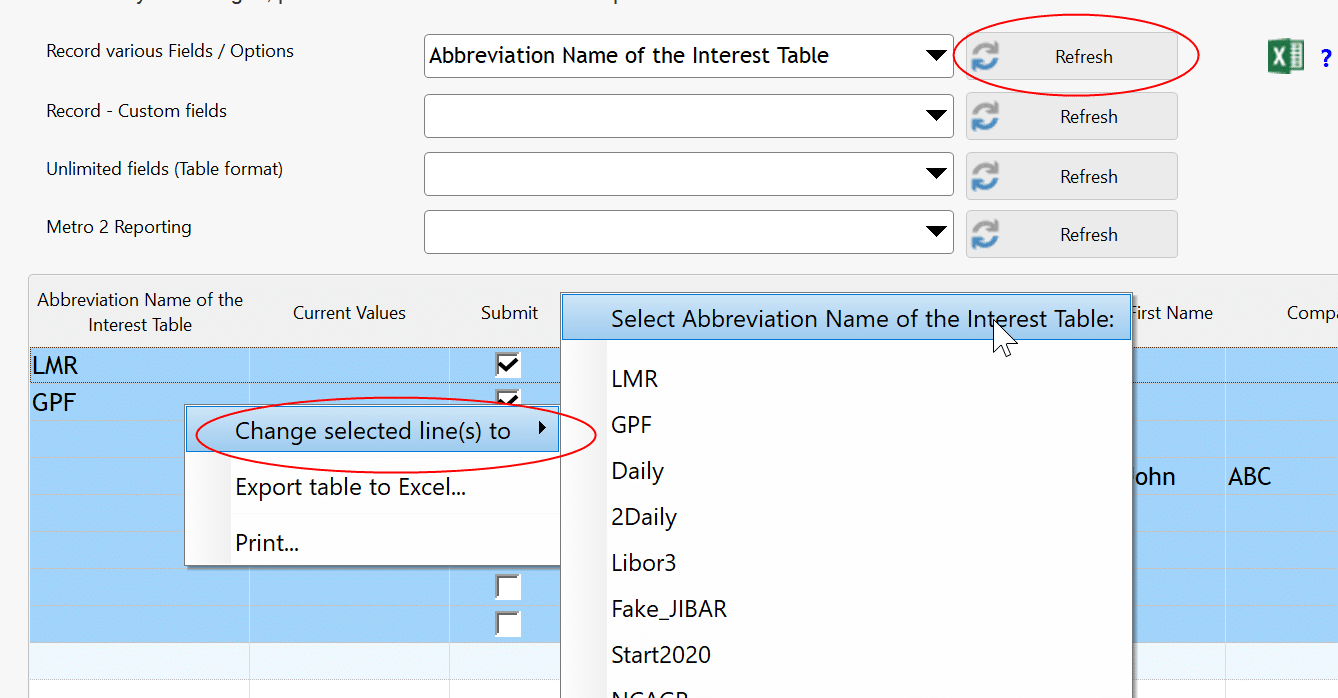
This is where you create those new tables (under Tools):
In my email I sent you the rates so you need not type in all the rates (not explained here). You can import rates from a simple Excel sheet or a Margill TVL format (our older rate table types).
You should create the Rate table with all rates including yesterday’s rate.
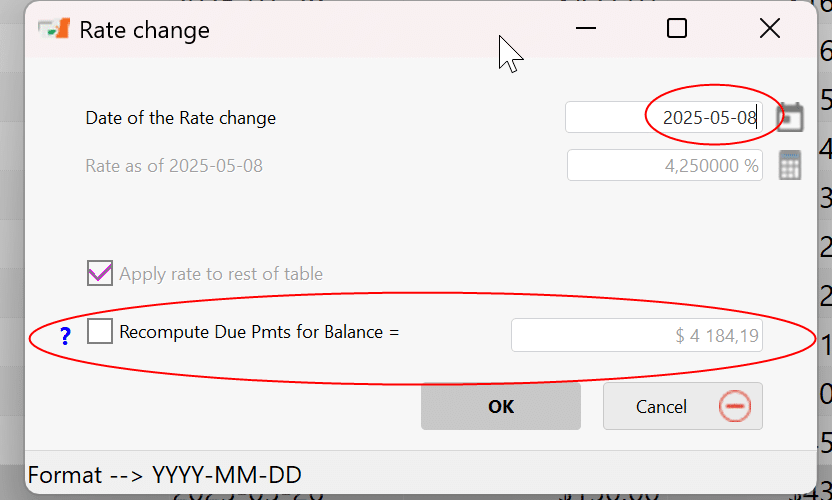
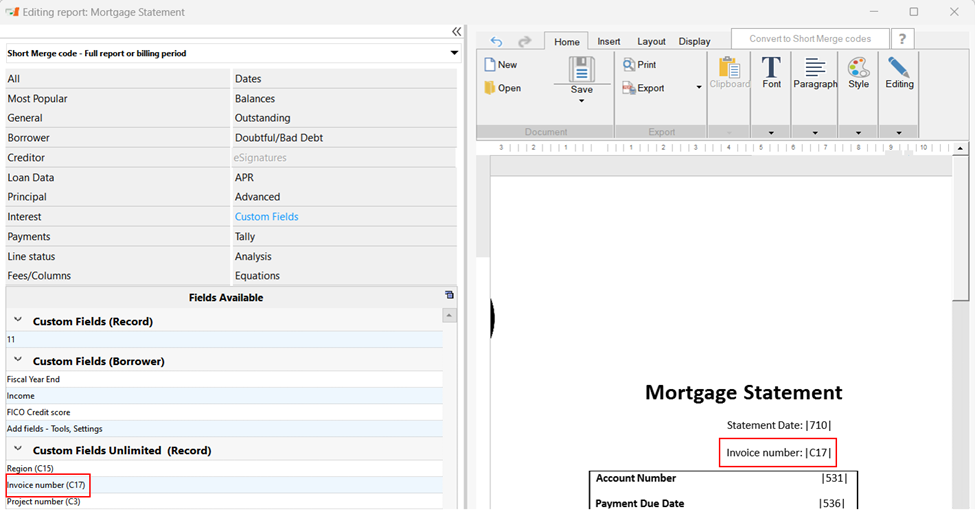
Once the Rate table is create, go to your loan (try one first manually before using the Global changes) and see all the circled items. You can also add your spread.
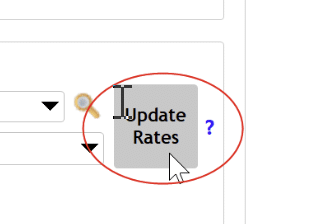
When you click on Update Rates,
be careful to change the date manually to yesterday, not today. The system will be default, enter today’s date, not your rate date from yesterday.
You can also have the Due Pmts recalculated automatically to reach the existing balance or another balance of your choice although this option will do this automatically – best is try out a few loans manually to see the exact process…

So there you have it. You will be all set when rates change in the future. You will then simply add the rate change and all loans linked to this table will automatically be update: interest rate and all Due payments!
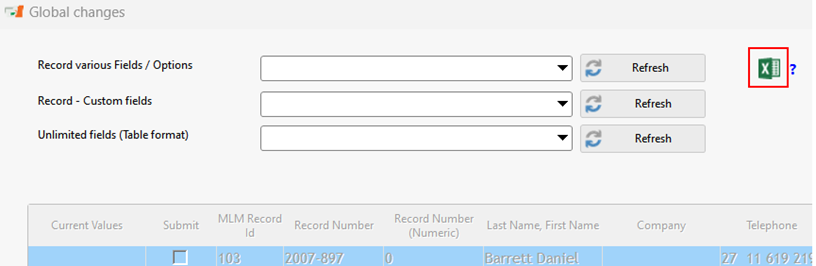
Global changes:
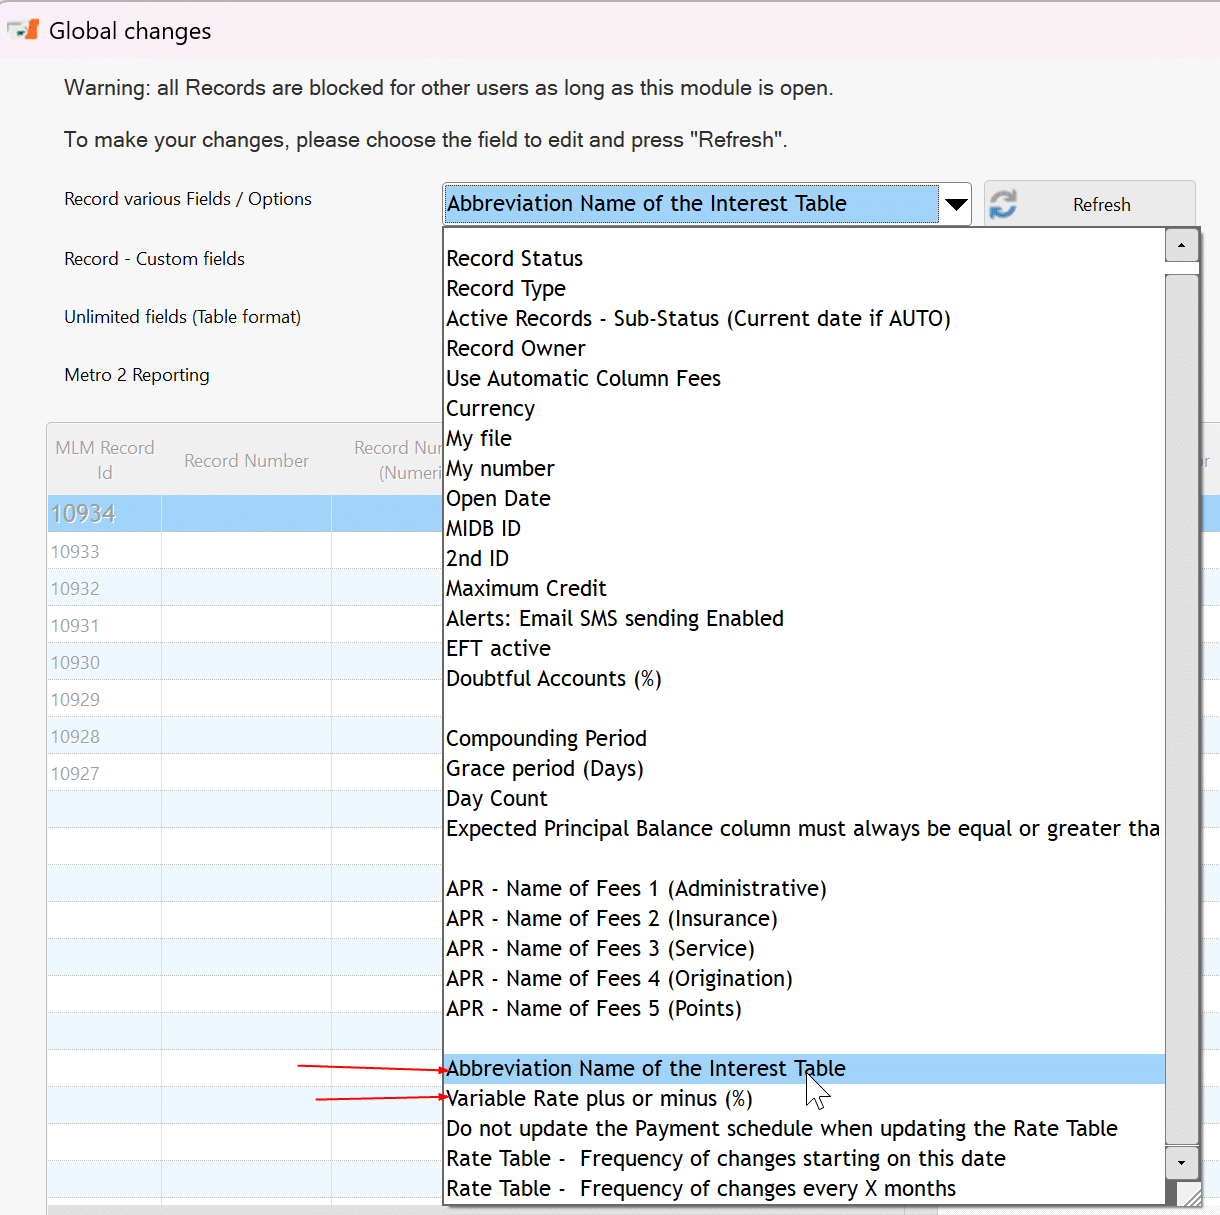
Global changes will allow you to update all loans of your chosing to the new Rate table and to enter the Spreads for each loan individually. In the Main window, choose the loans to update > right mouse click > Global changes
This is a two step process. First chose the table Abbreviation and Save.
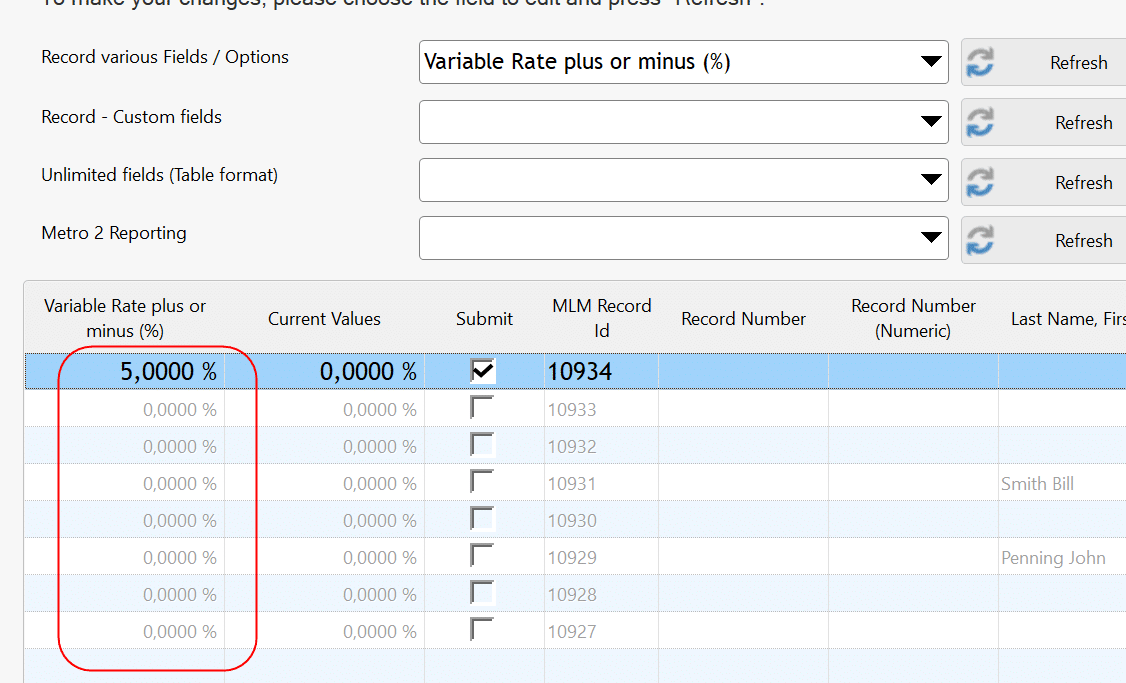
Then enter your spread (Variable rate +or -). You will have to enter all your spreads one by one if they are different. If no Rate table is tied to the loan, then you will notbe able to enter the spread:
So with this, all loans will have the Rate tables and spreads but not the auto Due Pmt recalculation unfortunately. This option:

So, no way around this, hyou will have to check the box loan by loan in the Data tab.
This has not been added to the Global changes. I guess we’ll have to add this to our To do list in version 5.8. On it.
Hopefully this will help you out…